Step 1: Make sure your computer is ready for Visual Studio
- whether your computer supports Visual Studio 2017 or not Please check the system requirements.
- Apply the latest Windows updates. These updates ensure that your computer has both the latest security updates and the required system components for Visual Studio.
- Reboot the computer to ensure any pending installs or updates are completed and they don’t hinder the Visual Studio install.
- If you don’t have enough space, then Free up. Remove unneeded files and applications from your %SystemDrive% by, for example, running the Disk Cleanup app.
Step 2: Download Visual Studio 2017
Click the following link, click Save and then Open file.
Step 3: Install the Visual Studio Installer
Now, run the bootstrapper file to install the Visual Studio Installer. This new lightweight installer includes everything you need to both install and customize Visual Studio 2017.
There are three types of Visual Studio
- vs_enterprise.exe for Visual Studio Enterprise
- vs_professional.exe for Visual Studio Professional
- vs_community.exe for Visual Studio Community
- From your Download folder, double-click the exe. If you get a User Account Control notice, Click Yes.
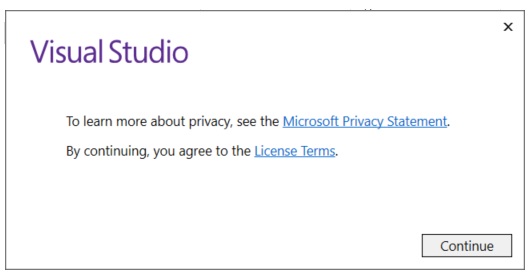
- Click on Continue to installation when you get following message popup.
Step 4: Select workloads
Now you can utilize the installer to customize your installation by selecting the feature sets—or workloads—that you want. Here’s how
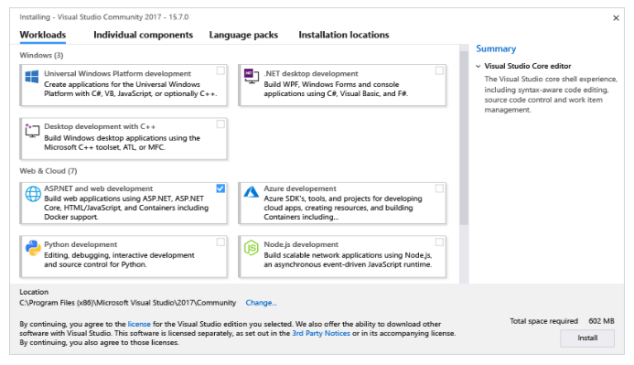
- Find the workload you want in the Installing Visual Studio
- Choose the workload that you want to install and Click Install option.
- After the new workloads and components are installed, click Launch.
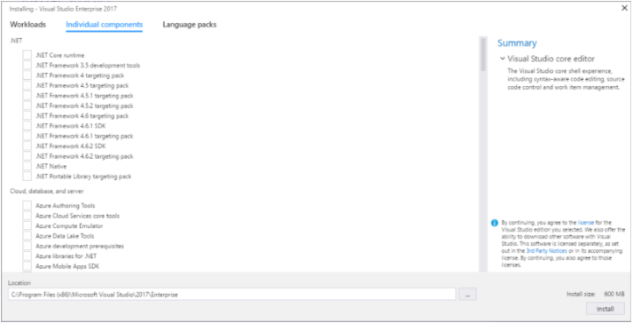
Step 5: Select individual components (It is Optional)
If you don’t want to use the Workloads feature to customize your Visual Studio installation, you can do so by installing individual components instead. To select individual components, click the Individual components option from the Visual Studio Installer, select what you want, and then follow the prompts.
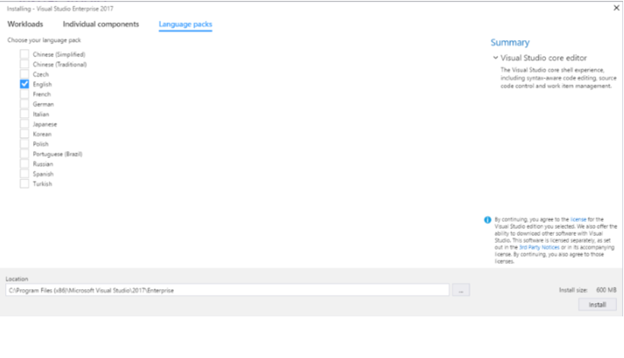
Step 6: Language Pack (Optional)
By default, the vs installer program tries to match the language of the operating system when it runs for the first time. To install Visual Studio 2017 in a language of your choice, click the Language packs option from the Visual Studio Installer, and follow the prompts.
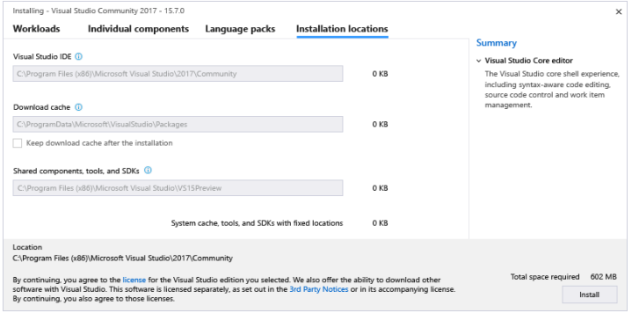
Step 7: Change the installation Location
You can now reduce the installation footprint of Visual Studio on your system drive. You can choose to move the download cache, shared components, SDKs, and tools to different drives, and keep Visual Studio on the drive that runs it the fastest.